Purpose
This section allows you to track all your orders in real time so that you can assort and strategize your investments efficiently.
SECTION WISE DESCRIPTION
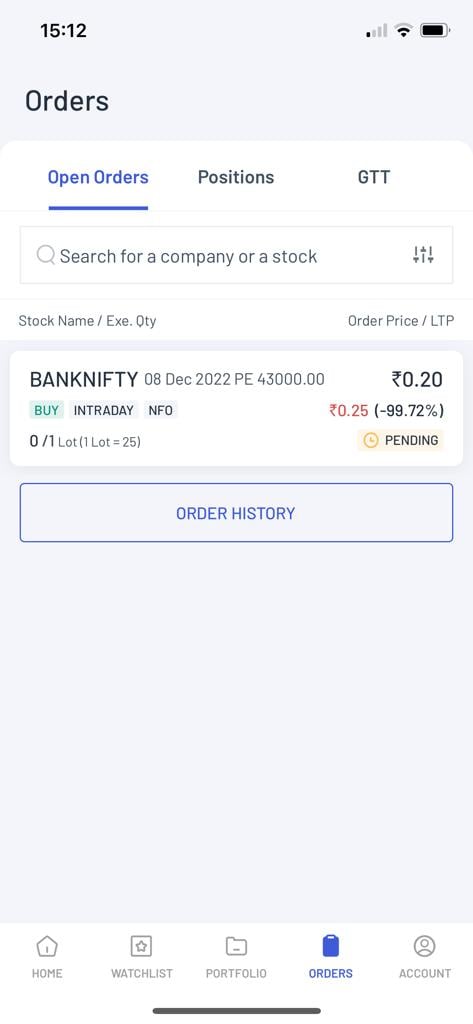
Open orders
This section will show you the list of all the orders given by you that are currently active (i.e. waiting to be executed by the app).
Each order in the list is accompanied by the following details -
- Name of the asset (along with details)
- Additional details e.g. if the order is an option, then the following details will be mentioned -
- Maturity date
- Strike price
- Option type i.e. call or put, intraday or delivery
- Action - buy or sell
- Lots traded in that order
- Order price and Last traded price
- Change in price (both in absolute and percentage terms)
- Status of the order e.g. pending
Below the list, you can also find the Order History that shows the list of all your past orders for a particular time period.
Filtering open orders
You can filter your Open Orders and Positions based on the asset segment i.e. Cash, F&O, Currency, Commodity and Indices. This filter will appear only when more than one asset classes are part of the Open Orders or Position list.
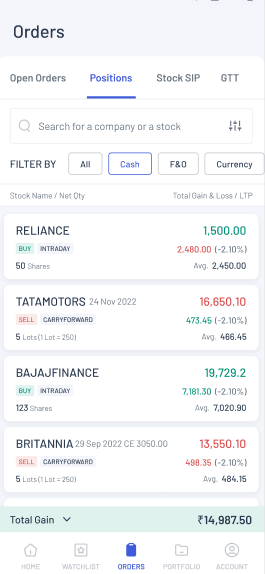
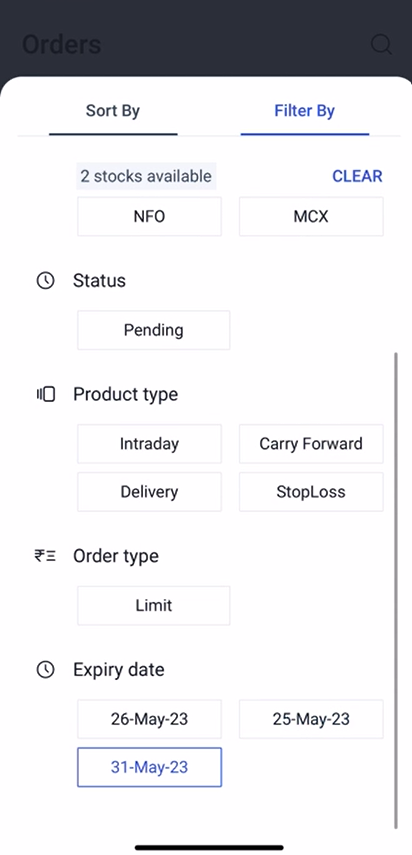
Fig.2: Filtering orders segment-wise (left) and filtering orders based on expiry date (right).
In addition to the above filter, the expiry date can be used as a filter on the Open Orders and Order History pages.
All you have to do is go to the Open Orders or Order History page, click on the filter button and scroll down. There you will find the list of expiries. Selecting a particular expiry from this menu will filter open orders or past orders of that expiry date only. This feature is applicable across multiple segments.
Order History
Under Open orders, if you click on Order History, you will find a list of orders placed by you so far (including orders that were rejected). For each order in the list, you will see the important details such as order type, number of lots traded, order status and the price at which the order was executed, as well as the LTP of the same asset.
Above this list, you will also find a dark box showing the value of the total buy transactions and of the total sell transactions made by you.
Clicking on a particular order will show you further details about the particular order such as -
- Timing of the order
- Reason behind rejection (if rejected)
- Broker Order No.
- Exchange Order No.
At this point you can also choose to repeat that order by clicking on “Reorder” - however make sure the reason why your order was rejected has been corrected.
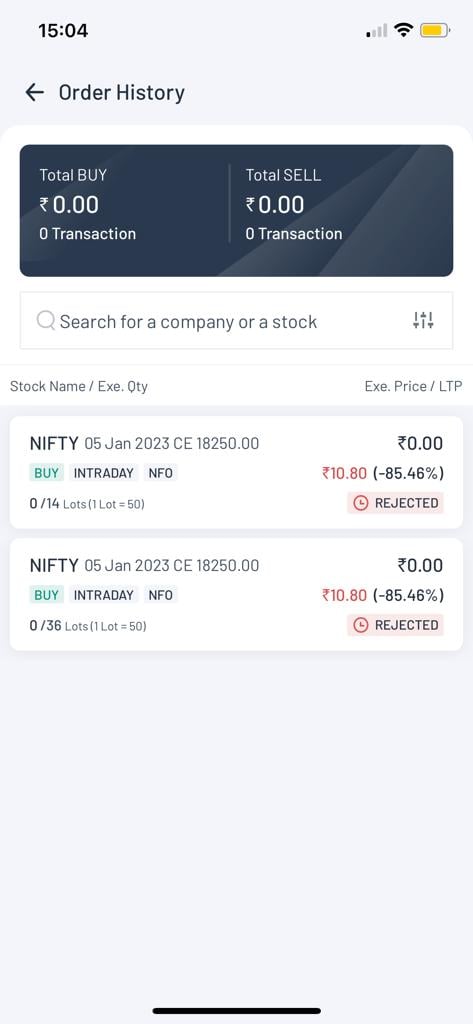
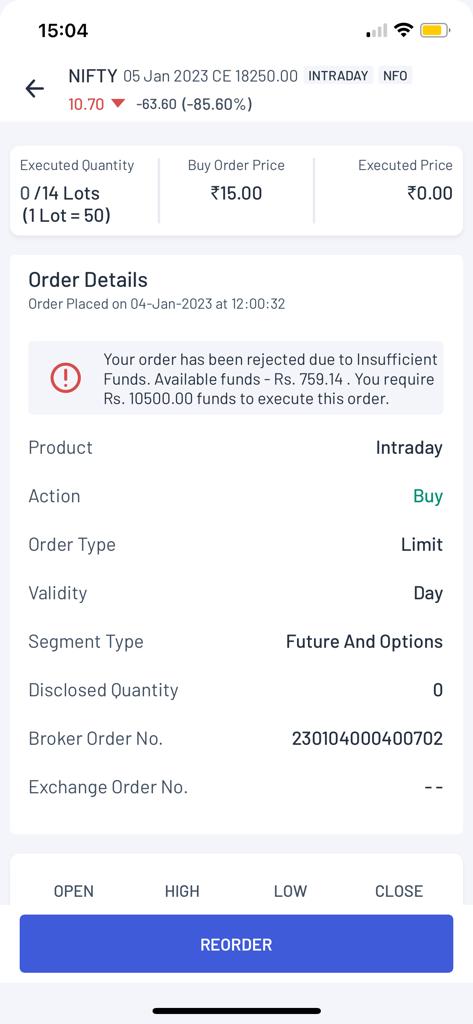
Figure: Order History (left) and individual past order (right)
Positions
This section shows the current position of each open order. It includes the same details for each order as shown under open orders.
However, in addition to the above details, it shows the following data points -
- Average price paid for the assets under that order
- Total gain or loss from all the positions combined
- List of closed positions
As mentioned before, the Positions can be filtered as per the asset class or segment that they belong to.

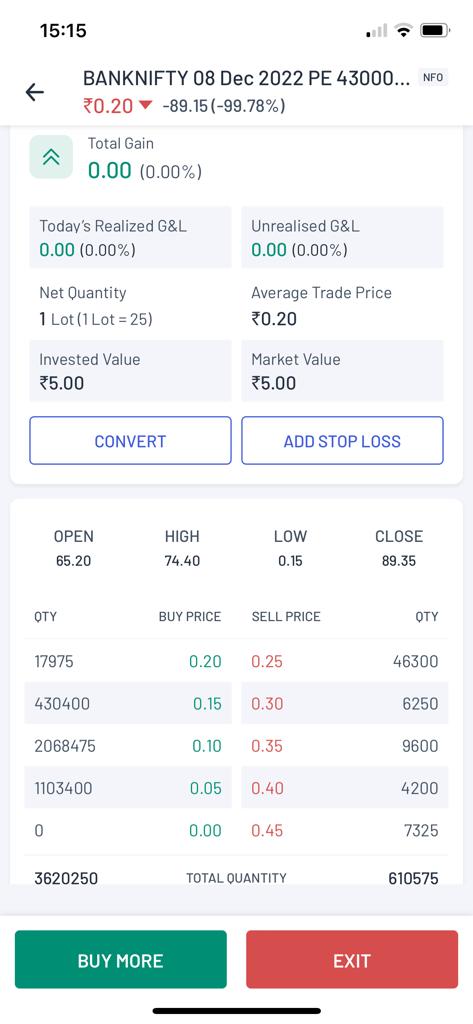
Figure: List of positions (left) and individual position details (right)
Baskets
Next to ‘Positions’, we have the section on ‘Baskets’. Let us now set some context on what is a basket and what are basket orders.
How to Create a New Basket from Orders?
If you want to create a basket in the Orders section, take the following steps:
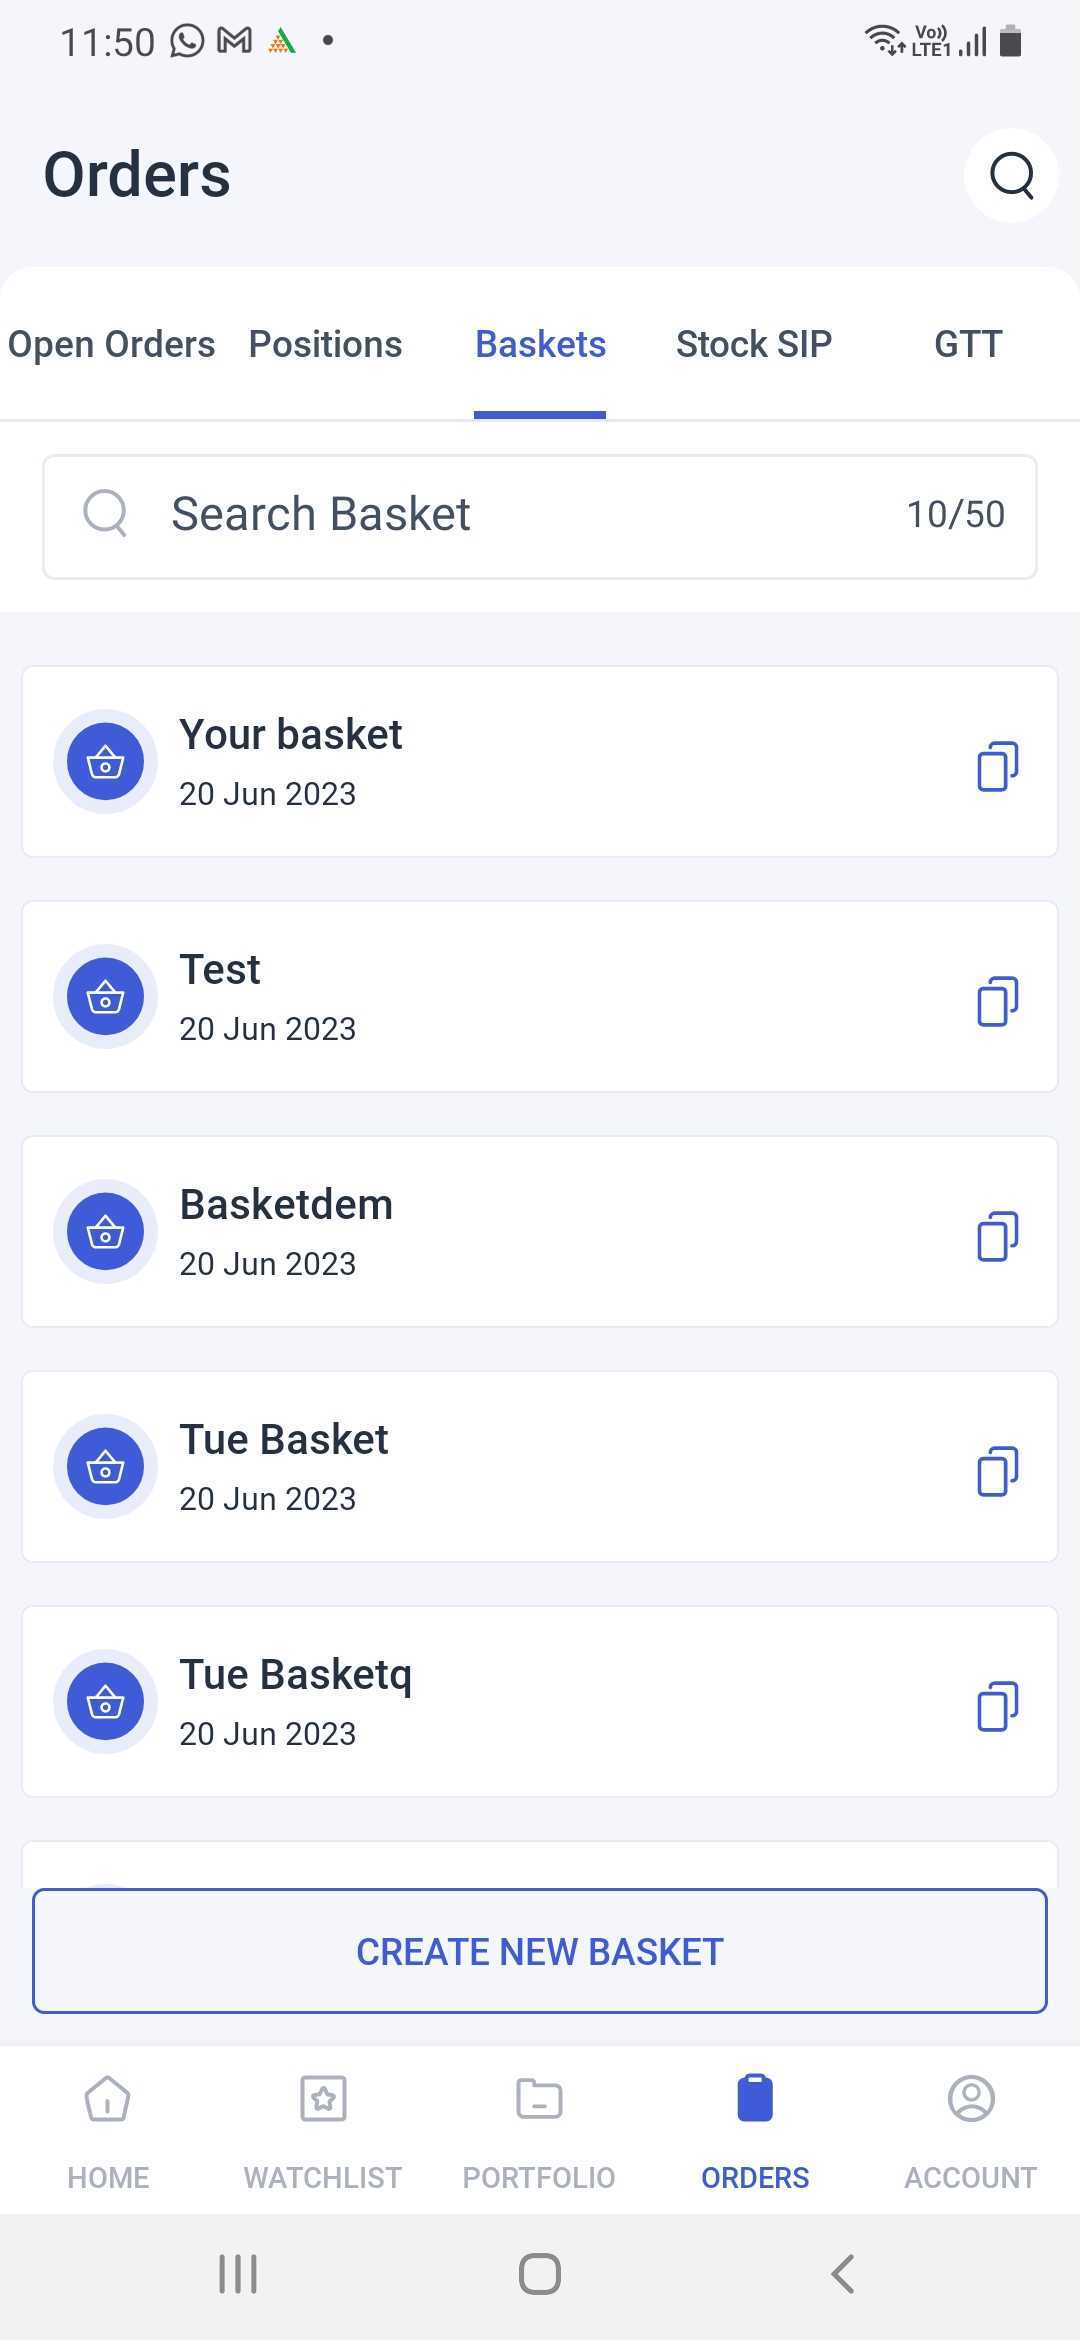
- Click on ‘CREATE NEW BASKET’.
- Start typing in the search bar to find scrips.
- Once you choose an asset, enter the order type (e.g. limit or market order, delivery or intraday etc.) and quantity.
- Once you have entered all the order details, click on ‘ADD TO BASKET’.
- If the basket is new, you must first save the basket. To do so, kindly click on ‘SAVE BASKET’ and then name it (within 25 characters).
- To add more scrips to the basket, follow the same process by searching and adding scrips.
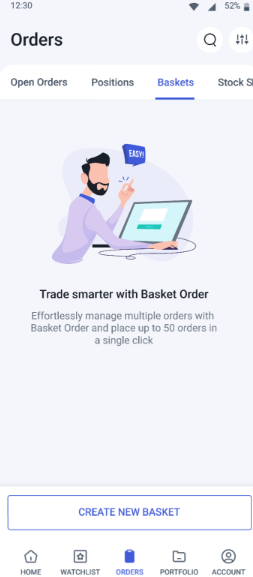
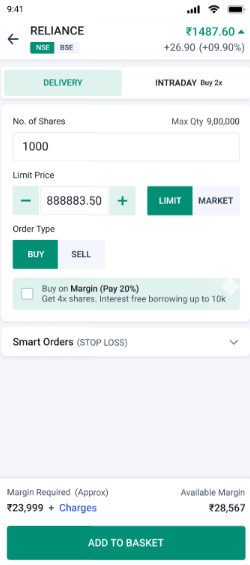
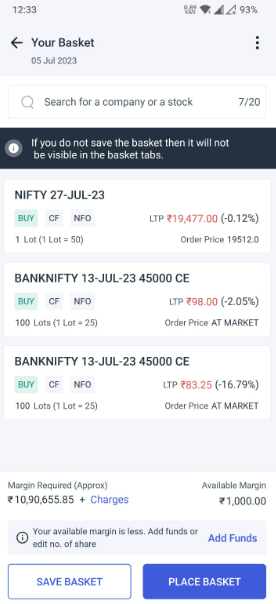
Figure: Create new basket (left), enter the details on the orderpad of the new scrip (middle) and save the basket (right).
Note: You can create and store up to 50 baskets at a time and you can add up to 20 orders in a single basket.
How to Place a Basket Order?
Once you are done adding scrips and you want to place the basket order, do the following:
- Go to the ‘Baskets’ section under Orders.
- Click on the basket which you want to place the order for.
- Click on ‘PLACE BASKET’ and then on ‘CONFIRM BASKET’.
Note: Before placing a basket order, you can check the margin required and the charges for the order right above ‘SAVE BASKET’. If the available margin is not enough, you will be notified of it here itself.
How to Delete or Modify an Individual Order in a Basket?
To delete or modify an individual order in a basket, take the following steps:
- Click on the particular order in the basket.
- Choose either ‘DELETE’ or ‘MODIFY’ as per your preference.
- If you click ‘DELETE’ then you just have to confirm once by clicking ‘YES’.
- If you click ‘MODIFY’ then you will be taken to the orderpad of the scrip where you can change the details. Once changed, click on ‘MODIFY ORDER’ below to confirm the changes.
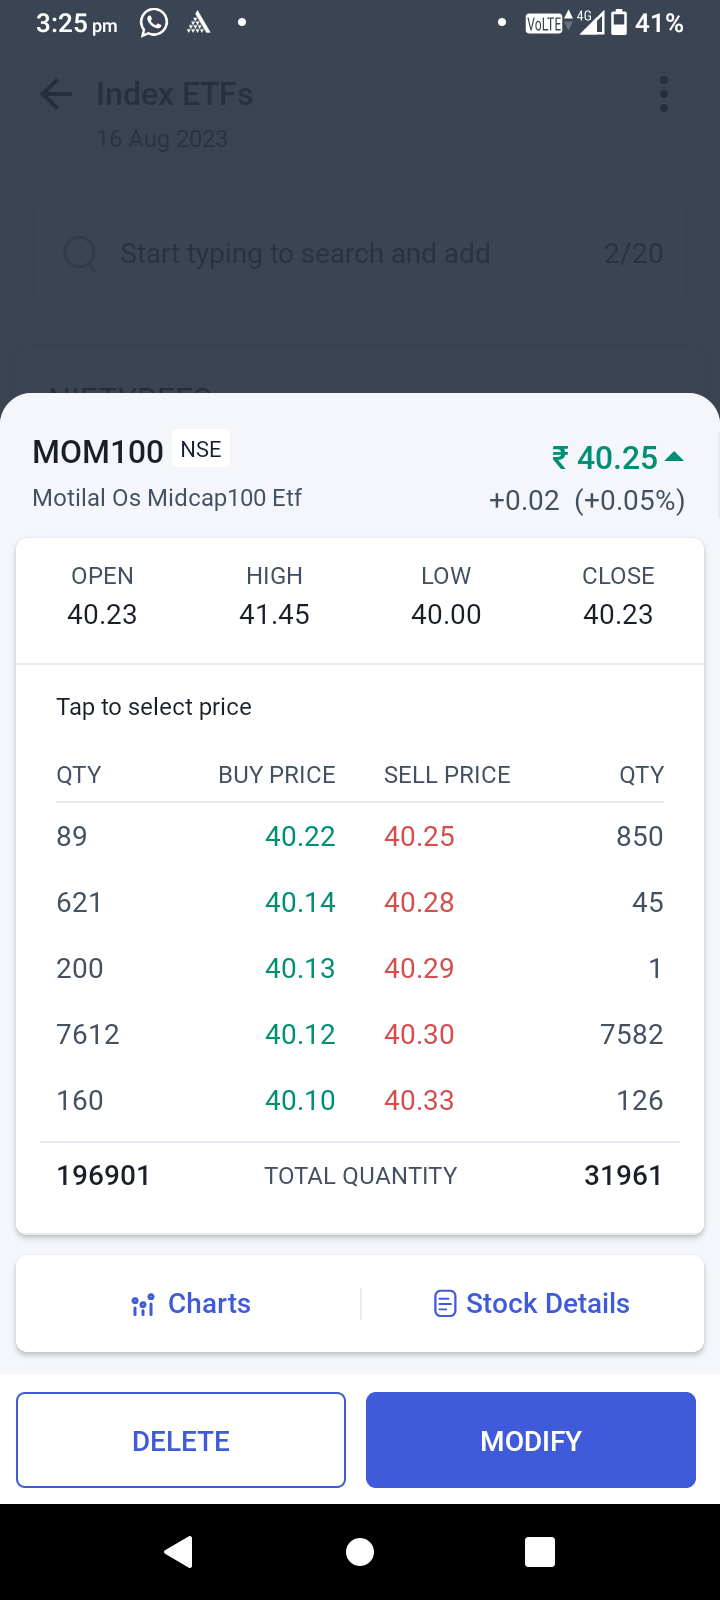
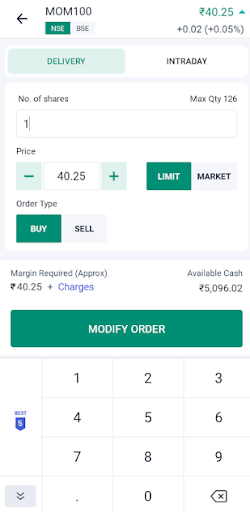
Figure: Reach delete or modify options by clicking on a scrip (left) and modify the order (right).
How to Clone a Basket?
If you want to create a replica of an existing basket, simply do the following:
- Find the basket on the ‘Baskets’ section by typing in the Search bar.
- Click on the copy icon to the right of the basket name.
- Choose a new name for the cloned basket in order to identify it.
- Click on ‘CLONE’ to confirm the creation of the replica.
Note: Suppose you have a basket named B1 of 20 orders and you want to create another basket named B2 that has 17 orders that are overlapping. Therefore, you can simply clone B1 and rename it B2. Thereafter you can simply pick and modify/delete/replace the remaining three scrips.
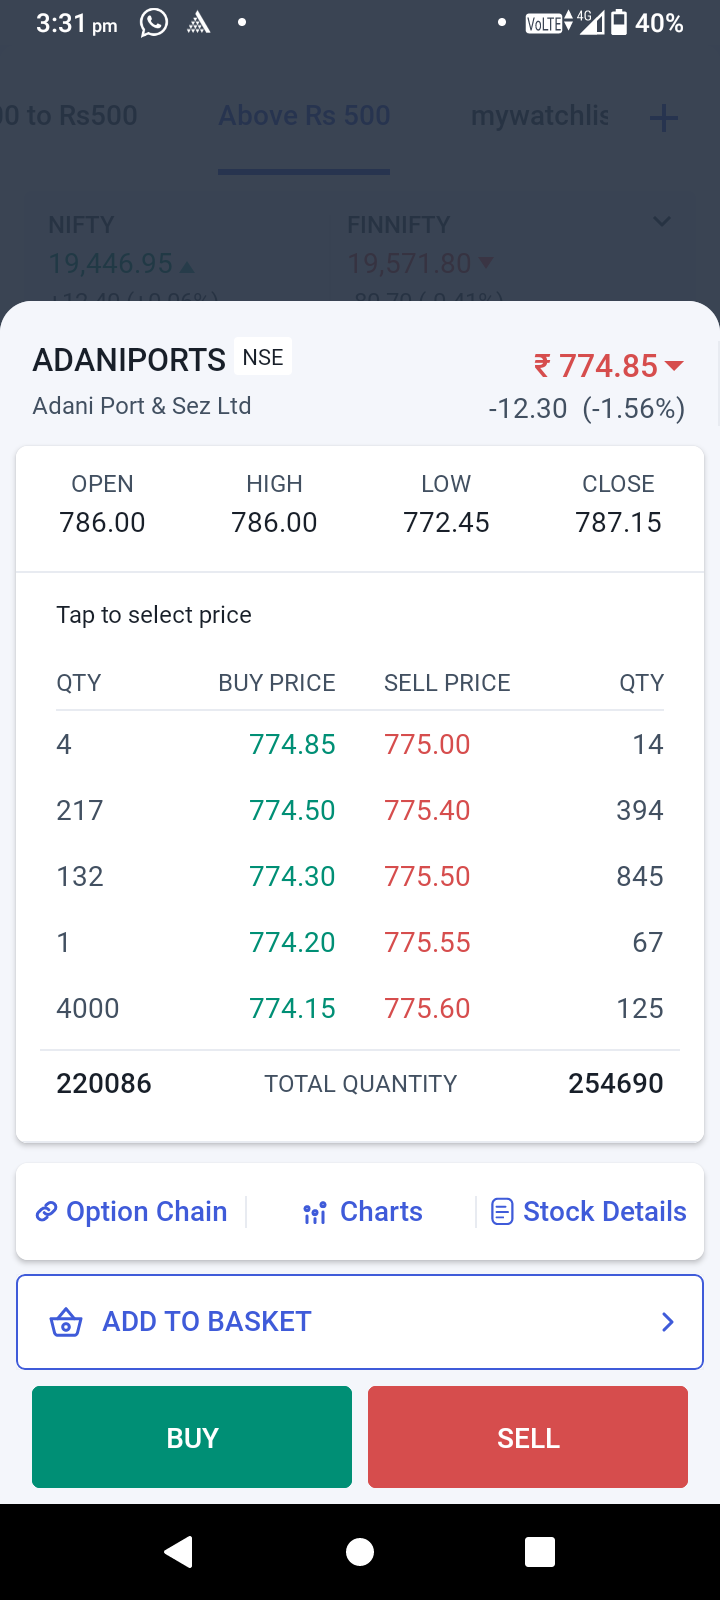
Adding Orders to Basket from Watchlist
You can add a scrip to a basket directly from the Watchlist itself. To do so, take the following steps:
- Click on a scrip from the Watchlist section.
- At the bottom, right above BUY and SELL, you will see the option to ‘ADD TO BASKET’. Click it.
- Here you can choose to add the scrip to an existing basket from the list in front of you. You can also choose to create a new basket to add the scrip to.
- Choosing an existing basket will take you to the orderpad where you can enter the order details and then click on ‘ADD TO BASKET’.
- Choosing a new basket will also take you to the orderpad. Once you click on ‘ADD TO BASKET’ you will be taken to the same page where you can save the basket and name it.
GTT
You can place a GTT order by going to either the “Buy” or the “Sell” sections of an asset and clicking on the “Smart order” option (right under the section where you enter the quantity of assets to be bought or sold). You can find more information on how to place smart orders under the watchlist section of this handbook.
Once you have placed the order you can track the order through the section of GTT under the Orders section of the app.
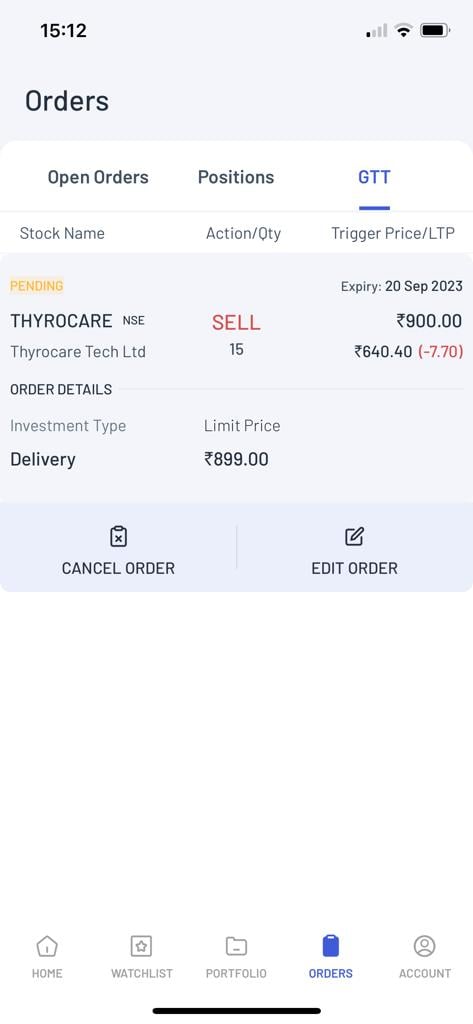
Once you reach the GTT section, you will see the list of your GTT orders. Each order will have the following information on this page -
- Name of the asset
- Action - Buy or Sell
- Quantity (Qty)
- Expiry date
- Trigger price - In larger font
- Last Traded Price (LTP) - located right below the trigger price
- Investment type - Delivery or Intraday
- Limit Price
- Option to “Cancel Order”
- Option to “Edit Order”
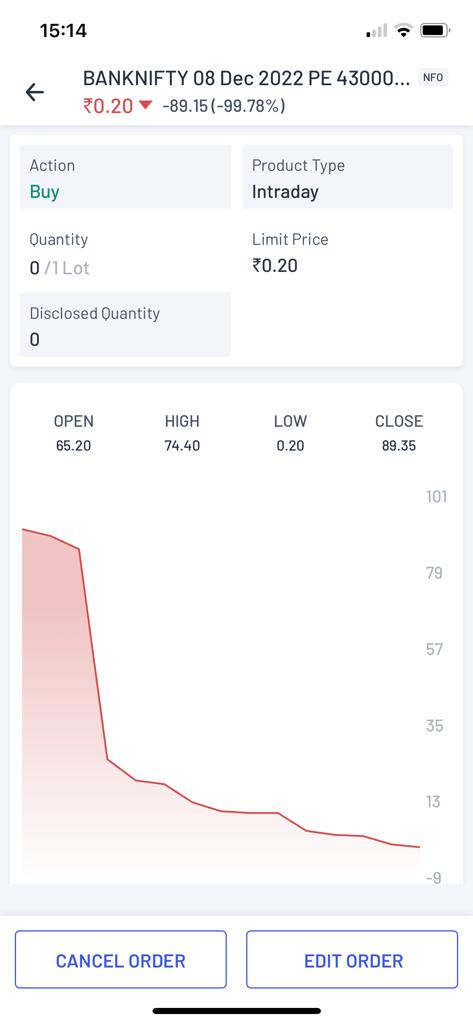
Clicking on an individual order will take you to a page showing some of the above details as well as a chart of the price action of the asset and its opening, high, low and closing prices of the day.
GTT History
Under this section you can view the list of GTT orders that you have placed during a timeframe. The GTT History section will show all your triggered, expired and cancelled GTT orders.
The Angel One User Manual is your complete guide to navigating our trading and investment platform with ease. Whether you are opening your first Demat account, placing an equity order, setting up an SIP, or applying for an IPO, our step-by-step guides help you understand every feature in detail. From login and dashboard navigation to advanced order types and reports, the user manual ensures you get the most out of Angel One. Designed for both beginners and experienced traders, it brings clarity to every action you take on our platform.
