Are you looking for retirement investment options? Have you heard of the National Pension Scheme (NPS)?
NPS is India’s popular retirement investment choice that covers all the essentials of an investment, from the flexibility of asset class and allocation to the security backed by the Government of India. Refer here to learn more about the investment options under NPS.
If you would like to choose to invest in NPS, you are in the right place. Here we are to let you know how to subscribe to NPS through Angel One.
The advent of technology has made applying to NPS simple through an online process and Angel One as Point of Presence (PoP) has made it simpler and hassle-free.
Before jumping into the application process, make sure you have the following requisites ready, to begin with:
- Permanent Account Number (PAN)
- An active demat account with Angel One for KYC verification
- Scanned copy of photograph and signature in *.jpeg/*.jpg/*.png format having file size between 4KB - 5MB each
- Scanned copy of PAN card and Cancelled Cheque in *.jpeg/*.jpg/*.png format having file size between 4KB - 2MB each
- Initial contribution (Minimum amount of ₹500)
Once the prerequisites checklist is ticked:
Step1:
- Click here to begin the registration process for NPS with NSDL
- Choose the appropriate options (Remember to choose the Permanent Account Number option for ‘Register With’ to complete the process online).
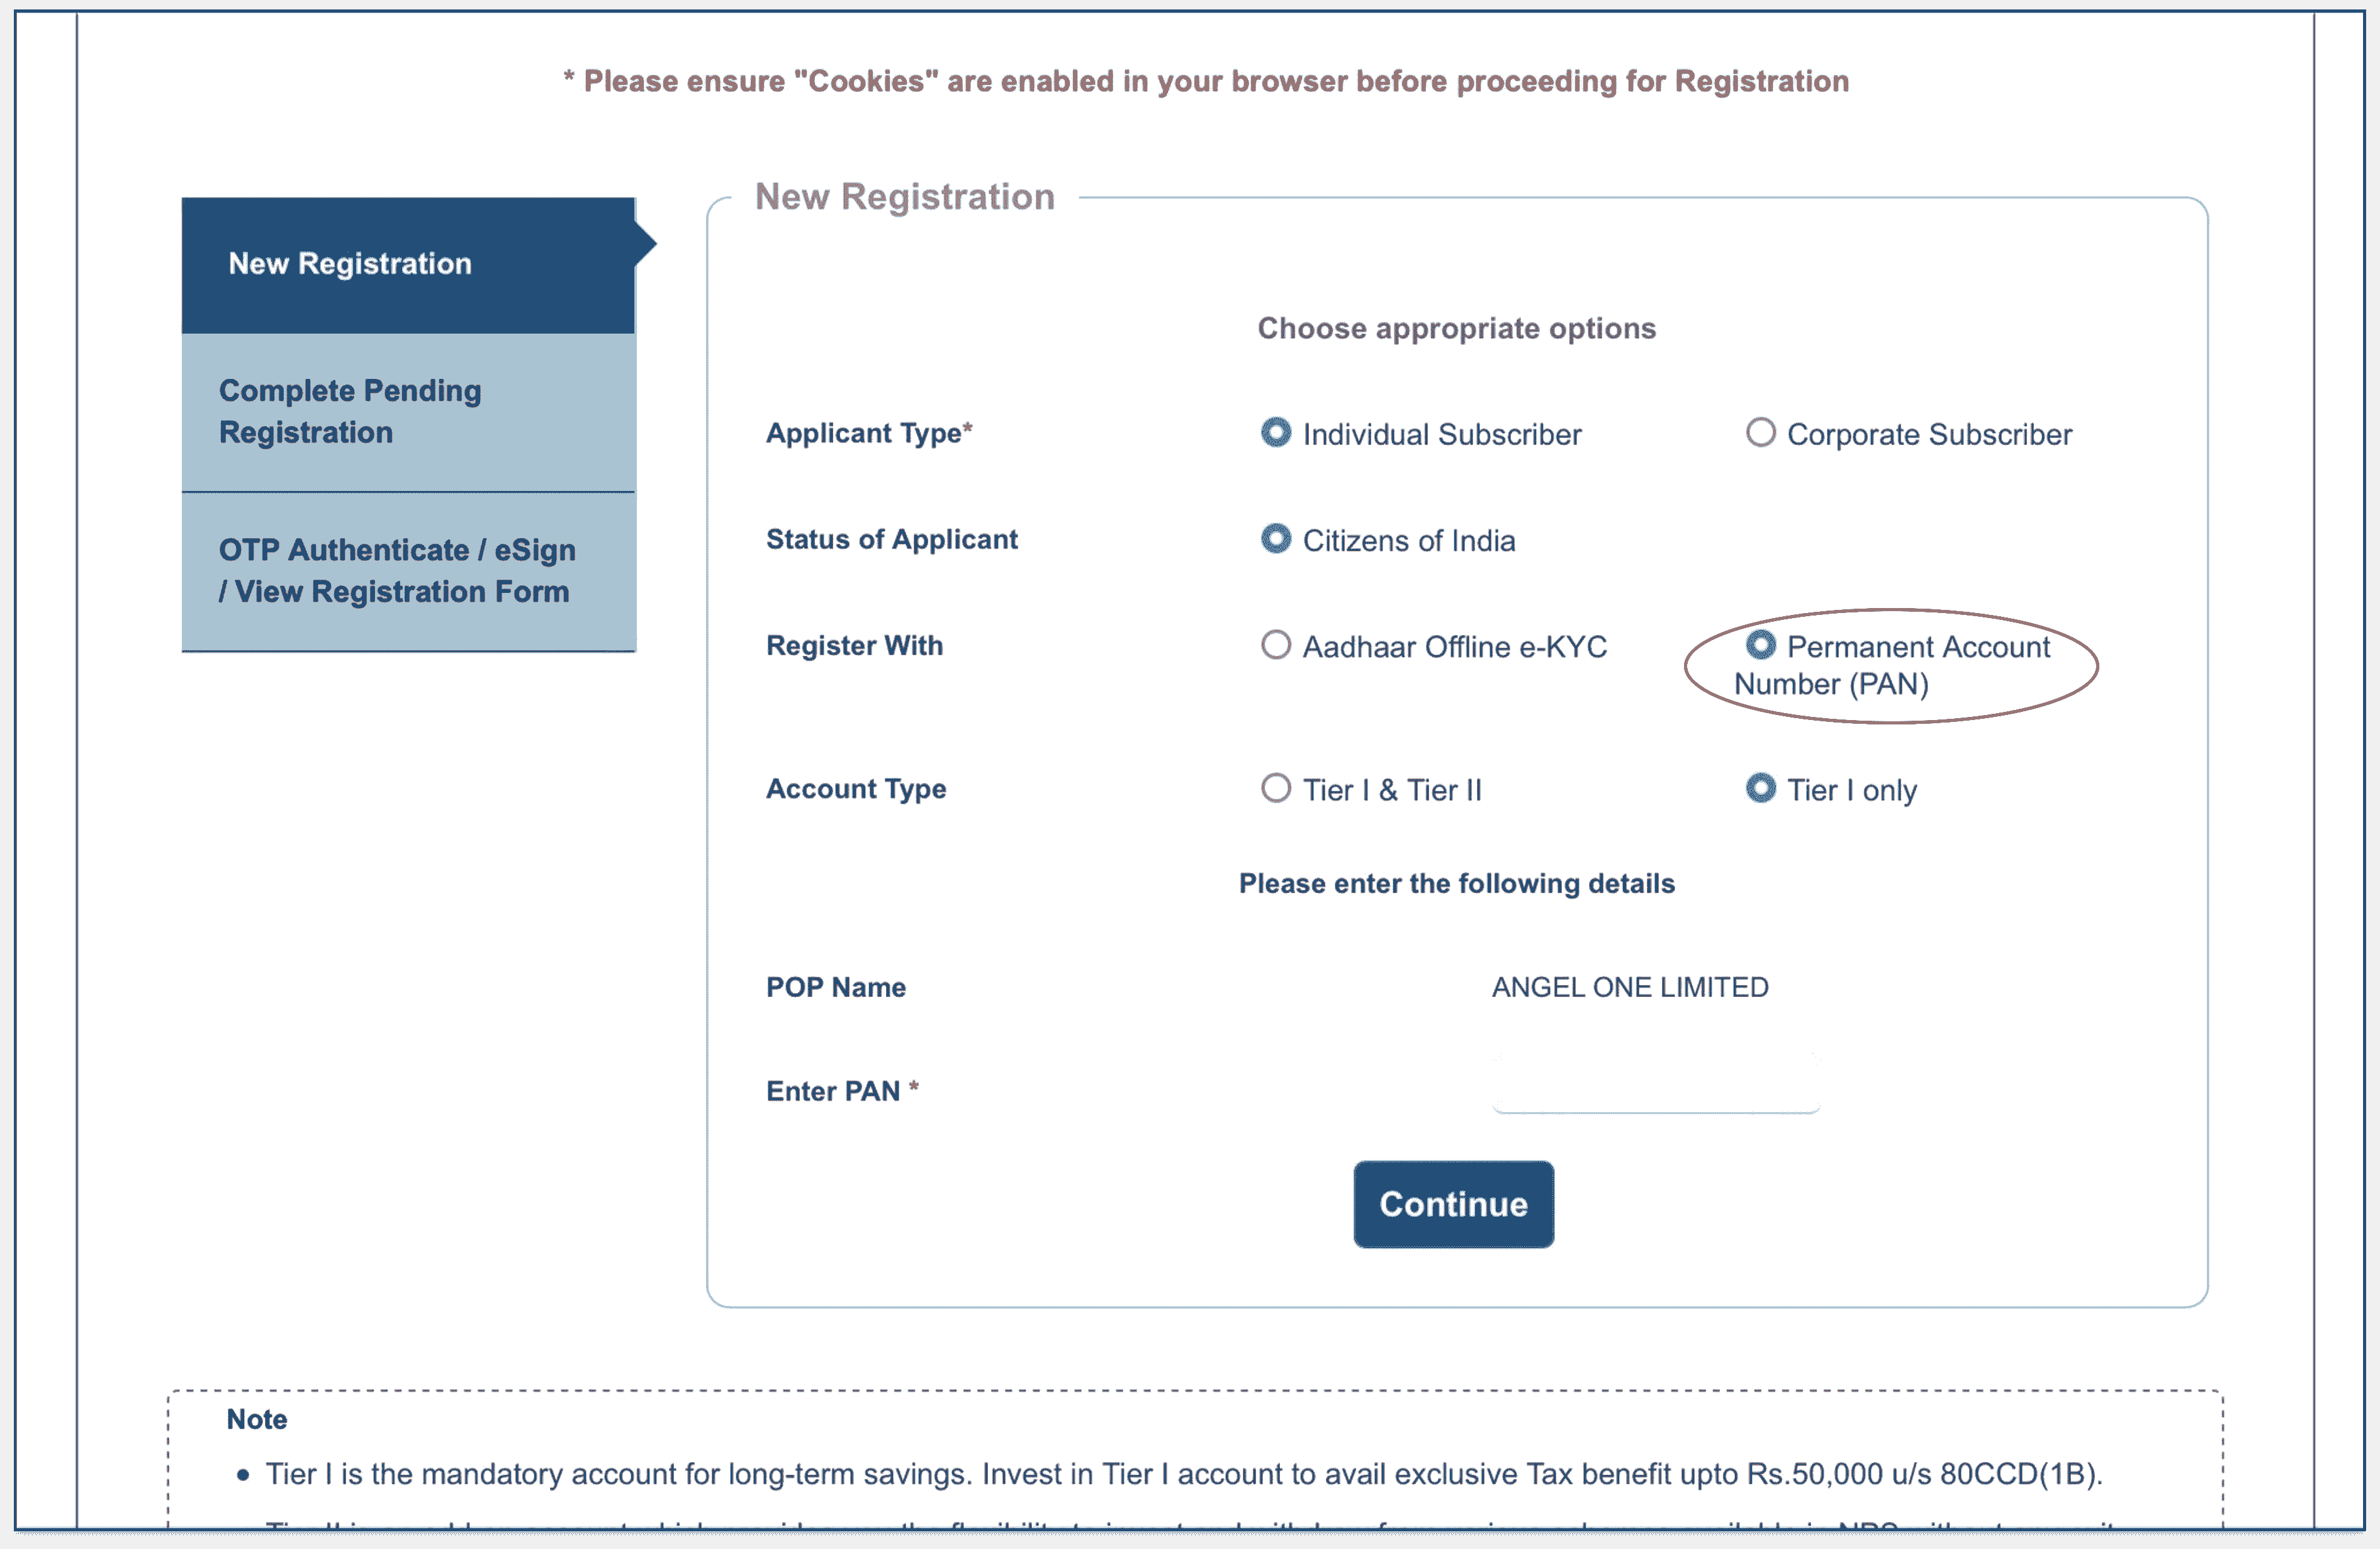
- Enter your PAN
- Click on ‘Continue’
Note: If you choose ‘Aadhaar Offline e-KYC’, the process becomes offline as you have to send the signed physical documents to Angel One.
Step 2:
- Begin to fill in the details
- Once you fill in the personal details, enter the captcha and click on ‘Generate Acknowledgment No’
- An acknowledgment number will be generated and the same will be sent to your registered email id and mobile number (Save the acknowledgment details).
- Click on ‘OK’ to continue the registration process
Step 3:
- Continue to fill in the further information
- Contact Details
- Bank & Other Details
- Scheme and Nominee Details
- Click on ‘Save and Proceed’ after filling in the inputs in each window. If you wish to modify any input entered, go to the respective window and click on ‘Reset’ to modify the information entered.
Note: Remember that the address you enter should match the address on the Angel One database to avoid rejection of KYC verification.
Step 4:
After filling in the details,
- Go to ‘Documents Upload’ where you have to upload the scanned copy of PAN and Cancelled cheque (now that you have it ready from the prerequisites)
- Click on ‘Upload’
Now go to ‘Photo & Signature Details’ where you have to,
- Upload the scanned copy of your photo and signature (must have them ready from the prerequisites)
- Click on ‘Save’
- Re-verify the Photo and Signature and then click on ‘Confirm’
Step 5:
After clicking on “Confirm”, the system will display all the information which are entered under
- Personal details
- Contact details
- Bank details
- Nomination details
- Scheme Preference
- Documents and Photo Signature.
If you wish to modify any of the inputs entered, then you can click on the “Edit” button and rectify the details. Once the details are verified, click on “Proceed”.
Step 6:
After clicking on ‘Proceed’, you are required to make a payment for the initial contribution, the amount you wish to with a minimum contribution of ₹500 + (Account Opening Charges + Processing charges + 18% GST on charges).
- Enter the amount and click on ‘Confirm Payment’
- A summary of the total contribution including charges will be displayed. If you wish to change the amount, click on ‘Edit Amount’
- Once you confirm the amount to be paid, tick the declaration box and then click on ‘Confirm Registration’ and make the payment through the payment gateway
Step 7:
Post successful transaction, your PRAN (Permanent Retirement Account Number) will be generated and the breakup of the payment done will be displayed in the receipt that you need to save/print for future references.
Step 8:
eSign to complete the registration process online.
- Choose eSign Subscriber Registration Form
- Click on ‘eSign and Download’
- Enter the Aadhaar number
- Tick the declaration box after reading it
- Click on ‘Request OTP’
- Enter the OTP received on your Aadhaar registered mobile number
- Click on ‘Submit’ to complete your NPS registration process
- Download the e-signed form by clicking on ‘Download eSigned Form’
Note: Your PRAN name should match your name on Aadhaar for a successful e-signing process.
If you have any queries or need assistance to fill the form or for any support w.r.t NPS, write to us at support@angelbroking.com or call us on 18001020. Begin your seamless retirement investment journey with Angel One anytime.
Disclaimer: This blog is exclusively for educational purposes.
Filing income tax accurately and on time is a key responsibility for every earning Indian. Whether you are a salaried employee, business owner, freelancer, or investor, knowing the rules around income tax helps you avoid penalties and make smarter financial choices. Angel One offers easy-to-understand guides on tax slabs, deductions, exemptions, and capital gains tax on stocks, mutual funds, and other instruments. Our content is regularly updated to reflect the latest budget changes, helping you stay compliant and informed throughout the financial year.
